

Welcome to the Fright Map Development Guide!
This guide will assist you in creating your very own map for the JasX game, Fright, especially when it comes to mastering the Fright Dev HUD.
Please note that this guide will not go into detail about how to build or script in Second Life. A general know-how of building is required to create a map, but scripting is not required at all! I have, however, included a small, handy script later in the guide to give you a little assistance with vents.
REQUIREMENTS
- FrightDev 1.1 HUD: You can grab this along with the main Fright game at the JasX Store at Quiddity.
- Just make sure you are using version 1.1!
- The TOME: This is the actual game controller for Fright, which you can get from any of the free maps (Just unlink it, it is full perm!).
- A Large Build Area: You will need plenty of space to build your map, a generous prim count, and a long auto-return timer so your work stays safe.
GUIDELINES
I highly recommend fully building your map before you do anything related to the FrightDev HUD.
Pick a theme and build it out, keeping the layout both interesting and fun. The trick is to create an environment where players have to constantly explore and search, while still leaving enough room to run, hide, or catch each other. Boxes to hide behind, dense forests to get lost in, and uniquely themed rooms are all great examples of how to keep things engaging.
As you build, consider where you might want to place elements like traps, treasure, and props, but don’t waste all your time stressing over it just yet; you can easily adapt your map later.
Keep these key factors in mind while building:
SIZE & PRIMS
The biggest hurdle when it comes to Fright maps is balancing their size, your prim count, and platform limitations. The larger the map and the higher the prim count, the harder it will be for hosts to find a location where they can actually rez it.
- The Sweet Spot: I highly recommend a maximum map size of 100m x 100m, with a cap of around 1,000 prims.
- Player Scale: Keep your target audience in mind. Don’t build a massive, sim-wide arena expecting 40 people to fill it. While that sounds amazing in theory, realistically, a typical match averages about 8 players. If a map is too big for the player count, people will just spend the whole game wandering around trying to find each other.
The trick is finding that perfect balance; keeping the environment dense and interesting, without draining the region’s performance or severely limiting where your map can be played.
TOME LOCATION
When building your map, you will need to place the TOME (which is usually shaped like a book) in a central or easily accessible location. This serves as the main hub where players gather to start the game, where the host configures the match rules, and where players must bring the treasure back to win.
Be sure to review the path tips below, as those details will help you decide exactly where to position the TOME within your custom layout.
There are two critical things you HAVE to keep in mind when setting it up:
DO NOT MOVE OR ROTATE THE TOME after using the FrightDev HUD!
DO NOT ROTATE YOUR MAP after using the FrightDev HUD!
I cannot stress this enough: if you use the FrightDev HUD to set up your spawn locations and then decide later that you want to change the TOME’s location, the TOME’s rotation, or the map’s rotation, all of your spawning positions for props, doors, traps, and items will be completely wrong. You will be forced to set up every single item all over again.
The reason for this is architectural. When you use the FrightDev HUD, every single spawn point is calculated and recorded as an offset relative to the TOME’s position and rotation. If you change the TOME’s location or orientation, your items’ relative spawn locations will shift with it.
Keep this firmly in mind before you record even a single coordinate, make absolutely sure your TOME is exactly where you want it to stay!
PATH TIPS
Paths back to the TOME are extremely important. You want to provide enough access points so that players can approach from different directions to return the treasure, but you also don’t want to make it so wide open that it becomes impossible for anyone to catch them.
This balance can be hard to find, and testing the map with a few people will give you a great idea of what you need to adjust.
OPTIMIZATION & BEST PRACTICES
I have found it the easiest to build the map as I like it first, and then start optimizing the following areas:
- Strategic Placement: Move furniture around to make trap, prop, and treasure locations interesting.
- Detailing: Add decorations where areas look empty or boring.
- Linking & Physics: Link as many items together as possible, using Convex Hull as the physics shape type, if you can, to bring your prim count down.
- Mesh Efficiency: Replace high prim count items with mesh where you can if you are not using mesh already.
Don’t Forget Backups!
CRITICAL: Do not forget to make BACKUPS! These maps can grow to be pretty large, making it very easy to accidentally delete something, texture the wrong object, or lose track of time and have a sandbox auto-return your entire map. Take frequent copies of your work to your inventory.
CREATE A NOTECARD
The FrightDev HUD controls all map settings and spawning locations.
⚠️ Prerequisite: Before using the HUD, the game TOME must be set up. Please see the information and warnings above.
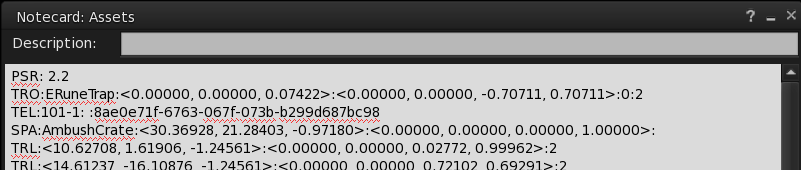
First, create a notecard. This notecard tells Fright what to rez and where. You will need it before you begin positioning your items.
1. Create Notecard
Create a new notecard in your inventory and name it Assets.
On the very first line of the notecard, type: PSR: 2.2
This setting controls how often items spawn. While you may need to adjust this later to find the right balance for your map, 2.2 is a solid starting point.
2. Add traps
Only add the lines for the specific traps you want to include in your game to the notecard. Typically, you will want to include all of them unless a specific trap does not fit your map’s theme.
TRO:ERuneTrap:<0.00000, 0.00000, 0.07422>:<0.00000, 0.00000, -0.70711, 0.70711>:0:2
TRO:Pistont:<-0.01241, 0.00684, -0.16260>:<-0.00000, 0.00000, 0.00000, 1.00000>:1:3
TRO:RuneTrap:<0.00000, 0.00000, 0.07422>:<0.00000, 0.00000, -0.70711, 0.70711>:0:2
TRO:SpiderTrap:<0.00000, 0.00000, -0.17139>:<0.00000, 0.00000, -0.70711, 0.70711>:0:3
TRO:Tiletrap:<0.00000, 0.00000, -0.22998>:<0.00000, 0.00000, -0.70711, 0.70711>:0:3
TRO:BearTrap:<0.00000, 0.00000, -0.14209>:<0.00000, 0.00000, -0.70711, 0.70711>:0:3
TRO:MothTrap:<0.00000, 0.00000, -0.10132>:<0.00000, 0.00000, -0.70711, 0.70711>:0:3
TRO:Ghosttrap:<-0.02599, 0.02077, -0.11597>:<0.00000, 0.00000, -0.70711, 0.70711>:1:3
TRO:Santasack Trap:<0.02046, -0.09583, -0.16357>:<0.00000, 0.00000, -0.70711, 0.70711>:0:3
TRO:Ice Trap:<0.02254, -0.02321, -0.04541>:<0.00000, 0.00000, -0.70711, 0.70711>:0:1
TRO:SnowTrap:<-0.04269, -0.09171, -0.06299>:<0.00000, 0.00000, -0.70711, 0.70711>:0:1
 ERuneTrap
Flash knockout
Strip completely
Area effect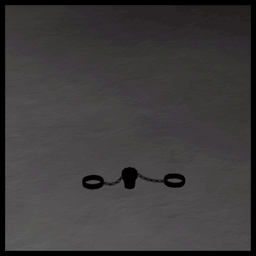 BearTrap
Traps your temporarily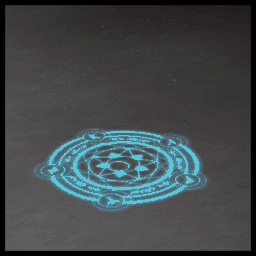 RuneTrap
Flash knockout
Strips one set of clothing
Area effect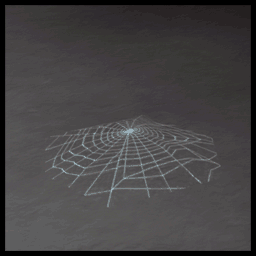 SpiderTrap
Trap you in a web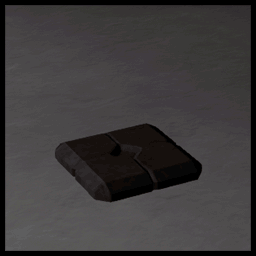 Tiletrap
Knocks out out
Area effect BearTrap
Traps your temporarily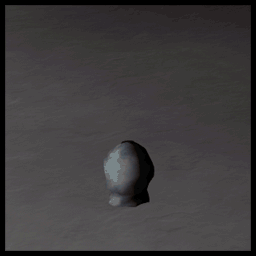 MothTrap
Strips completely
Area effect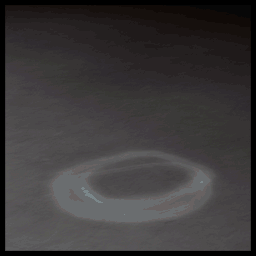 Ghosttrap
Erotic Ghost
Strips one set of clothing Santasack
Traps your temporarily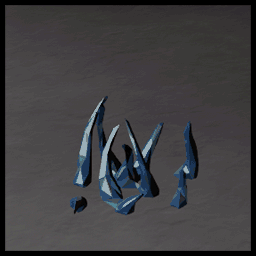 Ice Trap
Freezes your temporarily
Erotic Ice
Strips one set of clothing SnowTrap
Traps you in snow
Strips one set of clothing
Only add lines to the notecard for the specific props you want to exclude from your game. Unless a prop does not fit your theme, leave it out of the notecard entirely.
Refer to this page for details on available props and their functions: Fright Props
BLP:Dildo
BLP:Chocolatebar
BLP:Pumpkin_Pie
BLP:Cupcake
BLP:CandyApple
BLP:Candycorn
BLP:TreasureMagnet
BLP:TreasureFinder
BLP:CameraFlash
BLP:NoiseGen
BLP:Snarestake
BLP:FlashlightJammer
BLP:FlareGun
BLP:Glueflask
BLP:MothElixir
BLP:Spankpaddle
BLP:Pink Vibrator
BLP:Hologen 5000
BLP:Summoning Pendant
BLP:MagicMirror
BLP:Flashbombs
BLP:Holly Wand
BLP:Mistletoe
BLP:CandyDildo
BLP:Walnuts
BLP:HotChocolate
BLP:Julmust
BLP:Eggnog
BLP:EnergyDrink
BLP:Charged Pendant
BLP:Army Flashlight
BLP:Lantern
BLP:Flashlight
BLP:Work Lamp
BLP:Vintage Flashlight
BLP:Glow Vial
BLP:Spare Battery
BLP:Foodpack
BLP:Chompy
BLP:Bracer of Pantstealing
BLP:Night Vision Goggles
BLP:Muffin-theif’s Bandana
BLP:Glue Solvent
BLP:Neckbell
BLP:Emergency Stitching Pack
BLP:Pastamancer’s Spoon
BLP:The Lollygagger
BLP:Spellbook
BLP:Wizzy Hat
BLP:Vul Gas Grenade
BLP:Pocket Watch
4. Save the notecard
You will use this notecard to paste in the data you receive from the FrightDev HUD. The final version of this notecard will be placed inside the TOME (detailed later in this guide).
Alternative Approach: You can also use an external text or word document for easier editing and find/replace functions, then paste the final text into the notecard when you are finished. Use whichever method works best for you.
FRIGHTDEV HUD
Clicking most buttons on the FrightDev HUD will spawn a box in front of you. Move this box to your desired position and click it. It will output a line of text containing the item type, location, and rotation coordinates. You will copy and paste this text into the Assets notecard you created earlier.
Below is an explanation of what each button does, how to use it, and the data it returns.

ADD PROP
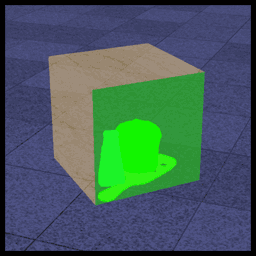
Click the button to rez a cube and place it where you want a prop to spawn. These are the items players pick up to use against others (flash bomb, ghost necklace, paddle, etc.) or on themselves (food, drink).
- Good Locations: Tables, counters, beds, seats, and crates are all ideal places to position props.
- Warning: Avoid placing props directly on the floor, as it can be difficult for players to pick them up when they are positioned too low.
Example
ASL:<-1.43226, -2.57622, 0.16138>:<0.00000, 0.00000, 0.78946, 0.61380>
PULL CHAIN
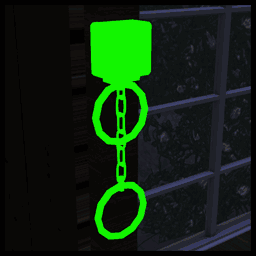
Stand close to and face a vertical surface (such as a wall or pillar) before clicking this button to spawn a pull chain. This item is used by players to unlock doors on the level.
- Good Locations: Walls will be your main focus for positioning pull chains.
- Important: How pull chains and doors link together is explained later in this guide.
- Warning: Ensure the pull chain is not blocked by any geometry, as a blocked chain will leave a door permanently locked and may break other game elements.
Example
TRG:PullChain:<0.46631, -1.62662, 1.24414>:<0.50000, -0.50000, -0.50000, 0.50000>:0
HUNTER SPAWN
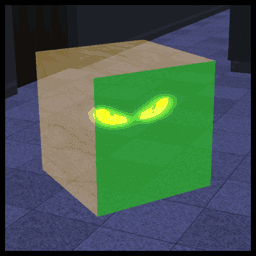
Click the button to rez a cube and place it where you want a hunter spawn point to be. This is where the hunter randomly spawns at the start of a match, and where players randomly teleport when they use a flash bomb.
- Good Locations: Best practice is to hide them behind crates, under stairs, or in out-of-the-way spots to minimize the chance of the hunter spawning directly on top of a player.
- Warning: Do not place a hunter spawn point inside a room that can be locked, or the hunter will be trapped until the door is opened.
- Warning: Keep the cube at the exact height it rezzes. If you lower it, the hunter will spawn stuck inside the floor.
Example
HSP:<-3.97649, -0.42627, 0.86011>:OFFSETHSP
TREASURE
Click the button to rez a cube and place it where you want a treasure to spawn. This is the main item players must find and carry back to the TOME.
- Good Locations: Place this in a hidden area, such as inside a locked room, and keep it a reasonable distance away from the TOME. This prevents the treasure from being found too quickly and gives players a chance to catch the carrier.
- Warning: Ensure the treasure is not blocked and does not spawn inside a wall or floor, or players will be unable to pick it up, preventing the match from ending.
Example
TRS:<-2.77027, 1.75032, 0.21143>:<0.00000, 0.00000, 0.63696, 0.77090>
TRAPS

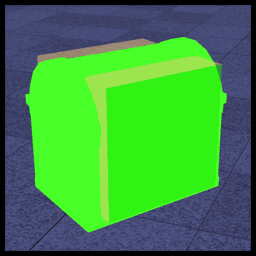
Click the button to rez a cube and place it where you want a trap to spawn. These traps will either trap or strip players.
The output text for this item has an extra option where you can add a 1, 2, or 3 to the very end of the line to control the trap type:
- 1: Spawns outdoor traps (Snow, Ice, Santa Sack).
- 2: Spawns indoor traps (Bear Trap, Piston, Rune).
- 3: Allows either indoor or outdoor traps to spawn randomly.
- Good Locations: Floors, walkways, and main paths. Slightly hiding the traps adds an extra layer of challenge to your map.
- Warning: Space your traps out and do not overdo it. Placing too many traps close together can ruin the gameplay flow.
Text Result Example
TRL:<-5.16827, 0.45842, 0.16138>:<0.00000, 0.00000, 0.58538, 0.81076>:3
DESC CREATOR
The Description Creator rezzes as an item, but you do not need to position it on your map. Instead, it is used to generate text strings that you copy and paste into an object’s Description field in your editing menu. This configures the object to perform specific actions, such as making footstep sounds, redressing players, or playing animations.
How to Use It:
- Click the Desc Creator item.
- Select your desired option from the menu.
- Select <PRINT> to output the specific text string.
- Copy that text and paste it into the object’s description field.
Below is a summary of what each option does and where to use it, starting with the two most important functions:
Footsteps (Important)
Allows floors to play specific sounds (like grass, concrete, or stone) when a player walks on them.
- Location: Anything a player can walk on. If you miss a floor surface, it will be completely silent when walked over.
Dresser (Important)
Generates the text string DRS, which allows completely stripped players to interact with the object to redress themselves.
- Location: Closets, dressers, wardrobes, or clothing piles.
Tap
Forces any player or hunter within range to turn and face the object when it is interacted with.
- Location: Windows or noisy items meant to alert nearby players.
MoveLock
Freezes the interacting player in place for a specified amount of time.
- Location: Environment hazards (for example, an icicle that freezes the player when touched).
Text
Displays a custom message on the player’s screen when they face the object.
- Location: Used on permanently locked doors, or to show descriptive/funny text on specific props.
Cooldown
Information missing – update pending.
Vul
Makes the interacting player vulnerable to being caught by the hunter for a set amount of time.
- Location: Items that cause a temporary disadvantage, like a slippery bar of soap.
Touchsound
Plays a specific sound effect of your choice when a player clicks the object.
- Location: Interactive audio objects, like a piano keyboard or a tapping window pane.
Seats
Allows the player to sit on the object immediately upon clicking it.
- Location: Beds, chairs, benches, and stools.
Animation
Plays a specific animation. You can view the full list of available animations by typing animlist in local chat while wearing the Fright HUD.
- Location: Any object where a physical pose makes sense (such as a sitting animation on a chair).
<PRINT>
Outputs the text string for your currently selected options in local chat so you can copy it into an object’s description.
<READ>
Reads and interprets an existing text string currently saved in the Desc Creator. Use this to paste in an existing object description to modify it or see what functions are assigned to it.
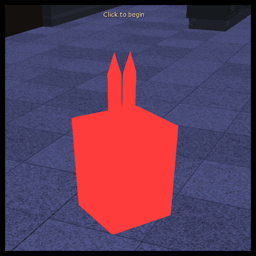
GET SCRIPT
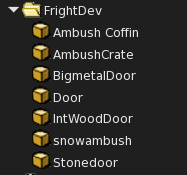
Selecting this option delivers a folder containing several interactive assets you can use to build your map, such as doors and ambush locations.
Just like with the other HUD items, you rez these objects on the floor, position them where you want them, and click them to generate the text string. You then copy and paste that text directly into your Assets notecard.
Door / IntWoodDoor / BigmetalDoor / Stonedoor
Rez the door of your choice on the ground and move it into position.
- Good Locations: Anywhere you want to delay players or lock the entry/exit to a room.
- Important: How doors and pull chains link together is explained later in this guide.
- Warning: Doors swing or move in a specific direction. Be sure to test the movement path before finalizing the position.
Setting up the Door Description:
Before clicking the door to generate its text string, you must give the door object a unique name in its description field (for example: Door1, Library, or Office). If descriptions are duplicated or left blank, the map will not rez the doors correctly.
Once the description is set and the door is in place, click it to get your text line for the notecard.
Example
SPA:IntWoodDoor:<2.03439, 4.92380, 1.16162>:<0.70711, 0.00000, 0.00000, 0.70711>:<1.29385, 2.50027, 0.28668>,Door1
TEL:Door1: :8ae0e71f-6763-067f-073b-b299d687bc98

AmbushCrate / Ambush Coffin / Snowambush
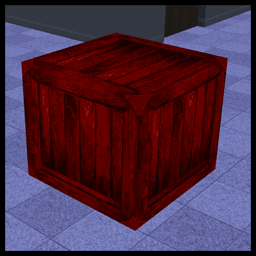
Rez the ambush item of your choice on the ground and move it into position.
- Good Locations: Place these where you want players to be able to ambush others. Corners, hallways, and areas where the item naturally blends into the environment are ideal locations.
- Warning: Do not overdo these on your map. Encountering too many ambush points close together can become frustrating for players.
Example
SPA:AmbushCrate:<0.90072, 6.00021, 0.43506>:<0.00000, 0.00000, 0.00000, 1.00000>:
BUY MESHES
This option provides a link to the JasX store by Jasdac Stockholm, where you can find free mesh items to use when building your level.
DOORS & DUCTS
DOORS / PULL CHAIN
Doors and pull chains need to be carefully balanced to keep your map interesting and prevent all doors from unlocking at the same time. The total number of pull chains you place determines exactly how many doors will start the game locked.
Example: If your map has 10 pull chains and 12 doors, exactly 10 random doors will be locked at the start of the match, while the remaining 2 doors stay unlocked.
Avoid the “Chicken and Egg” Trap: If you place pull chains inside multiple rooms that can be locked, the system might randomly assign a locked door’s chain to the room blocking the other chain. This creates an impossible loop where neither door can ever be opened. Always place pull chains in locations that players can access without needing to unlock a door first.
DUCTS / TELEPORTERS

Vents can be configured to let players travel across the map quickly without having to physically walk between locations. To set this up, you must calculate the local distance between the entry and exit points and add that data to the entry object’s description.
- Measure the local distance between your ENTER and EXIT points. You can use the helper script provided below to calculate this automatically.
- When determining your exit coordinates, add a slight offset so players do not teleport inside a wall or vent frame.
- Apply the following format to the entry duct’s description field:
TEL:NAME:<Local distance exit to> CUS
(Replace <Local distance exit to> with your calculated coordinates, and NAME with a unique identifier for that specific vent pathway).
For example:
TEL:DUCT:<7.5,1.8,0.7> CUS
Additionally, add the following line to the notecard. This determines the sound effect that will play whenever a player enters a duct.
TEL:DUCT:cb37b81b-bfef-cdf9-6f2c-9605801732e2:01206f26-d594-00f7-9236-0676e58654cf
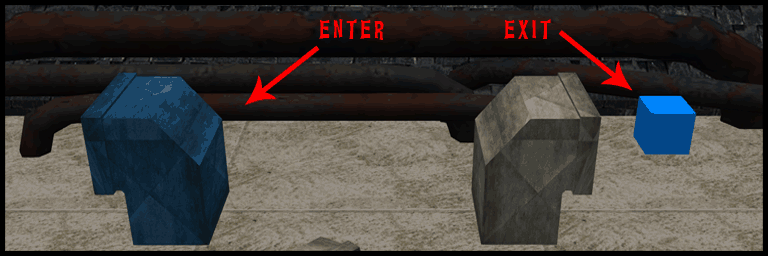
The image below illustrates the ENTER point and the corresponding EXIT point. Note that the exit location is represented by the blue cube rather than the second duct itself; this ensures the player does not spawn stuck inside the mesh geometry of the exit vent.
Enter and Exit position calculator script
vector ENTER = <1,1,1>; //Add the position of the enter location.
vector EXIT = <2,2,2>; //Add the position of the exit location with the offset.

default
{
    state_entry()
    {
        llOwnerSay("Distance to exit is: " + (string)(EXIT - ENTER));
    }
}
ALMOST DONE!
Saving Your Map Data
Once you have placed all of your elements and generated the text strings, put everything into the Assets notecard you created earlier.
- Open your TOME‘s contents.
- If an older
Assetsnotecard is already inside the TOME, delete it. - Drop your newly updated
Assetsnotecard into the TOME.
Testing Your Map
- If everything functions correctly on your solo run, organize a playtest with multiple people. A group of 5 players is generally ideal for balancing and testing mechanics, though the optimal number may vary depending on the size of your map.
- Attach your Fright game HUD and click the TOME. You may need to reset the TOME’s scripts to force it to read the new notecard data and rez your layout components.
- Join the match, start the game, and carefully monitor the area to ensure all items, spawns, and traps rez exactly where they should.
That is it! I hope this guide helps you create a really fun map for Fright.
If you have any feedback about this guide, or questions regarding Fright map creation in general, please use the contact form on my website or contact me directly in-world.
~Drau ♥
Credit to:
- Jasdac Stockholm for creating these games we enjoy.
- Kulza Bluestar for the continued development of Fright and assistance with this guide.
Images taken in Second Life by Drau
Guide written by Drau